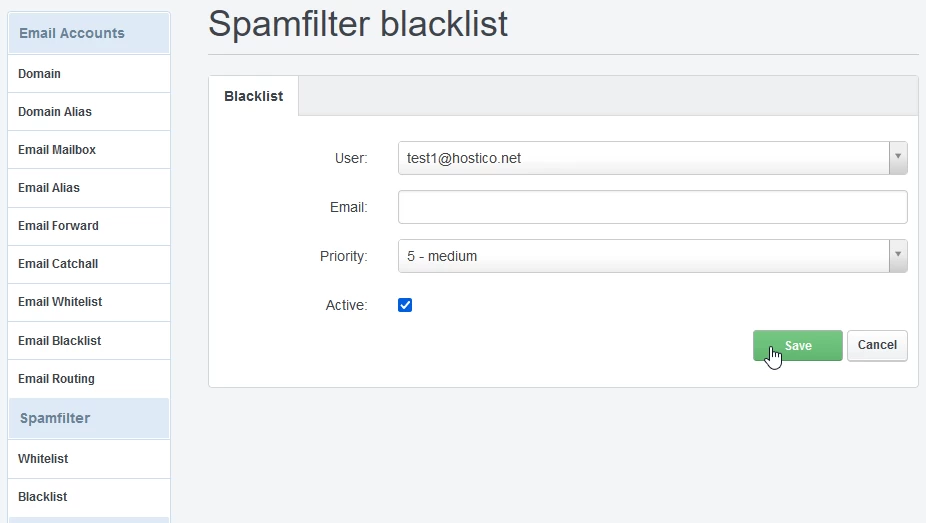
Adding an email address to the spamfilter blacklist in the ISPConfig control panel.
This tutorial presents how we can label emails received from a specific email address as spam, regardless of their legitimacy.
Introduction
- The Blacklist menu in the Spamfilter section of ISPConfig allows us to mark any message received from an email inbox as spam, regardless of whether it is spam or not.
Requirements
- The administration details of the ISPConfig panel received in the email inbox associated with the Hostico account when the VPS was activated.
Steps to follow
- First, we will connect to the ISPConfig control panel using one of the access addresses: https://NUMESERVER:10200 or https://IP_SERVER:10200 or https://DOMAIN.XX:10200.
- In the interface that will be displayed, the user and the administration password for the panel, received via email upon service activation, will be entered.
To add an email address to the spamfilter blacklist, click on the "EMAIL" button in the navigation bar at the top.

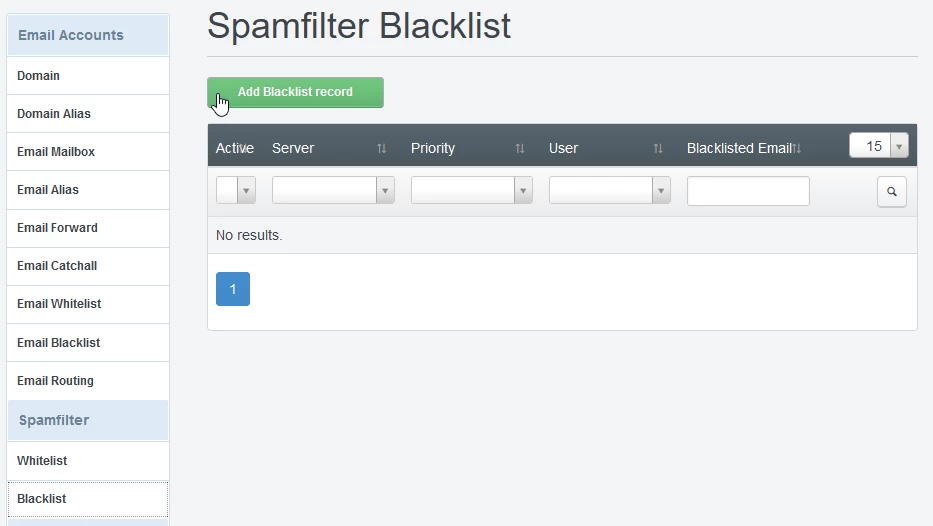
- Then, from the left menu, we go to the Spamfilter category and select "Blacklist"
- To add a new rule, we will press the green button "Add Blacklist record".
On the page that appears, we will fill in the fields as follows:
1. In "User" we will select the email inbox to which we want to apply the spam filter;
2. In the "Email" field, we add the email address we want to add to the blacklist (all emails coming from the email address set in this field will be marked as spam). If we want all email addresses of a domain to be marked as spam, we will fill in: @example.com, without specifying the user of the mailbox in front of @;
The "Priority" field is used for more granular filtering when applying email filters in both the Spamfilter Whitelist and in the Spamfilter Blacklist for the email inboxes of a domain. This field specifies which rule should be applied first (10 = highest priority, 1 = lowest priority);
For example, if you blacklist the domain @exemplu.com with a priority of 5, and whitelist user@exemplu.com with a priority of 6, emails from the user@exemplu.com inbox will not be filtered, while any other inboxes of the exemplu.com domain will be filtered.
4. We check the "Active" box to activate the filter, after which we press the Save button.